

Step 1: Know your Domain
Your blog must have a domain name, for example the domain name of this platform is draftandedit.com.
Make sure to enter that as the domain.
Step 2: Use an Appropriate Site Title
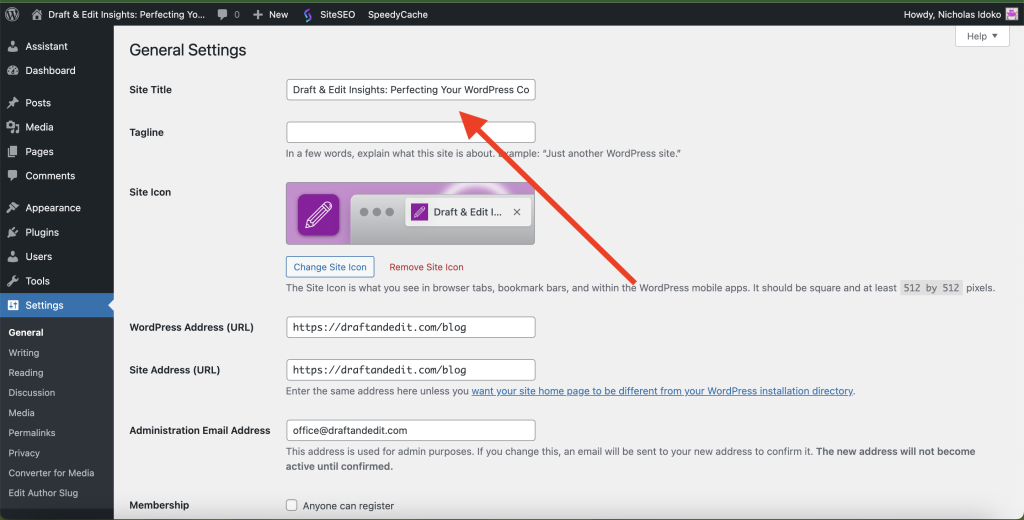
Make use of the right site title that bests describes your blog. You can always use the same site title in the Settings > General of your WordPress site as you can see from the screenshot below.
Step 3: Ensure you use the right URLs
Your URL must have either http:// or https:// prefix and ensure it ends with a trailing slash.
For Example, https://example.com is WRONG.
The RIGHT way is https://example.com/
Now, for the WordPress URL, make sure it has the http:// or https:// prefix, just as explained above, and ensure it is the URL of the WordPress platform.
There can be situations where the WordPress URL platform can be the same as the URL.
Your WordPress URL can be https://example.com/blog/ or https://example.com/
Please note: “blog” is used as a placeholder in the WordPress URL.
Step 4: Know your WordPress Username
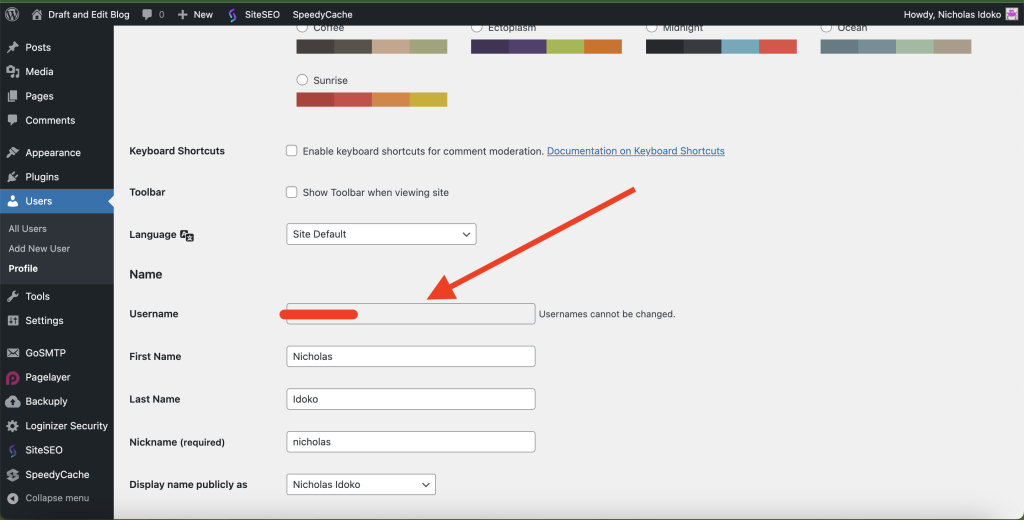
When creating your WordPress account, you definitely provided a username.
You can also get the username from editing the profile of the WordPress user.
This user has to have Administrator privileges.
Step 5: Get Your WordPress Application Password
This password is used to send drafts to your WordPress platform.
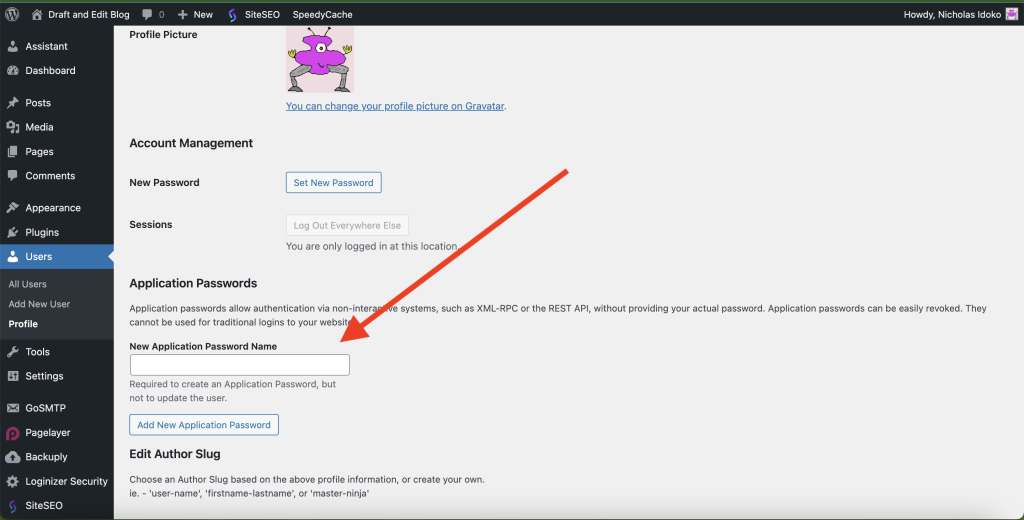
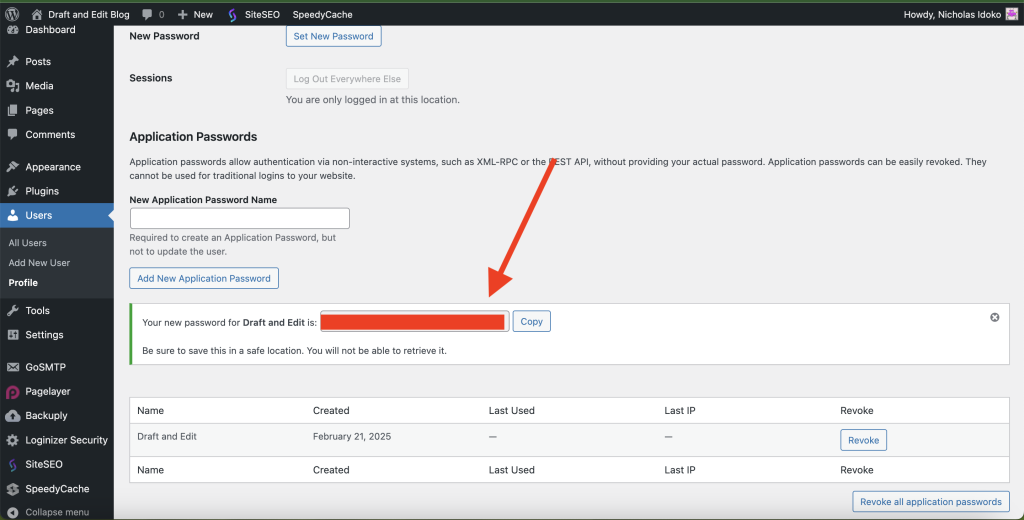
Follow the steps in the screenshots below to get the application password.
Remember, the user has to be an Administrator or have Administrator Privileges.
You can obtain this application password by editing the profile of the user.
Now enter, Draft and Edit as the Application Password Name
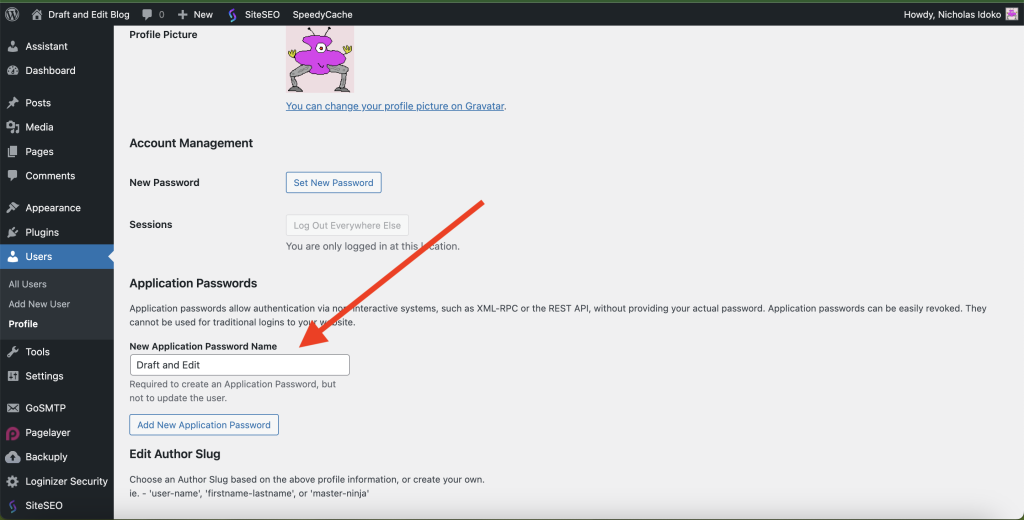
Once you have done, that click on “Add New Application Password”, the WordPress Application Password would then be generated for you.
Step 6: Submit your Domain
Finally, select the Post Editor Type for your WordPress you prefer your draft to be saved as and then submit.